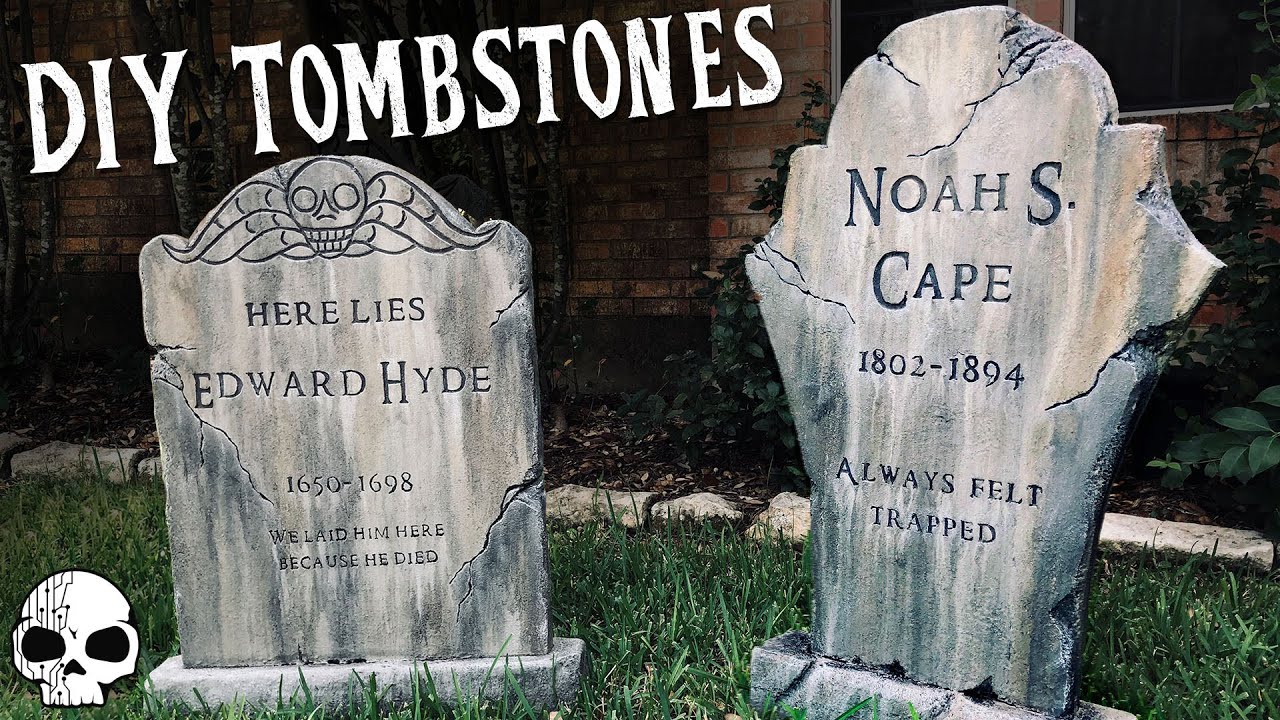
Hey there! Have you ever thought about creating your own DIY Halloween tombstones out of foam? Well, look no further! Join Jaimie and Jay from Wicked Makers as they craft realistic Halloween props using insulation foam board and carving tools. Halloween is just around the corner, and they are excited to share their newest DIY project with you.
Watch as they demonstrate how to texture, engrave, seal, paint, and detail the foam tombstones for an aged effect. You can even add additional details like lichen or moss to make them extra spooky. Check out Wicked Makers’ YouTube channel for more Halloween DIY projects and get inspired to create your very own tombstones for the upcoming Halloween season. Get ready to impress your friends and trick-or-treaters with these amazing foam tombstones!

Overview of DIY Halloween Project
Halloween is a spooky and fun time of year, filled with decorations and props to set the mood for the season. One popular DIY project for Halloween is creating foam tombstones to add a creepy touch to your home or yard. In this article, we will guide you through the process of making your very own DIY Halloween tombstones. From the materials and tools required to the techniques used for carving and painting, we will cover all the steps necessary to create realistic and chilling tombstones for your Halloween decorations.
Introduction to DIY Halloween Tombstones
Tombstones are a classic Halloween prop that adds an eerie atmosphere to any haunted house setup. By creating your own DIY foam tombstones, you can customize the design and details to match your desired aesthetic. Whether you want traditional gothic style tombstones or modern and quirky designs, making your own Halloween decorations allows you to unleash your creativity and set the perfect spooky scene for the season.
Materials and Tools Required
To create DIY foam tombstones for Halloween, you will need the following materials and tools:
- 2″ insulation foam board: This dense foam material is perfect for carving and shaping tombstones.
- Water: Used for texturing the foam to create an aged stone effect.
- Carving tools: Utility knife and rotary tool for engraving and detailing.
- Heat gun: To create texture on the foam and enhance the aged appearance.
- Dry lock masonry sealer: Seals the foam tombstones and provides a protective coat.
- Craft acrylic paint: Gives the tombstones a weathered and aged look.
- Washes, dry brushing, stippling tools: Used for adding final detailing and enhancing the overall appearance.
- Additional details like lichen or moss: Optional elements to add realism and depth to the tombstones.
Techniques Used for Creating Foam Tombstones
Creating foam tombstones involves several techniques to achieve a realistic and spooky appearance. The key techniques used in this DIY project include:
- Carving and engraving with utility knife and rotary tool to create intricate designs and text.
- Texturing with water and heat gun to simulate the weathered look of aged stone.
- Sealing with dry lock masonry sealer to protect the foam and give a finished appearance.
- Painting with craft acrylic paint to add color and depth for a more realistic effect.
- Final detailing with washes, dry brushing, and stippling tools for added dimension and texture.
- Adding additional details like lichen or moss to enhance the overall look and create a more haunting atmosphere.
Step-by-Step Instructions
- Cutting the foam board into tombstone shapes: Use a utility knife to cut out the desired shape of the tombstones from the insulation foam board.
- Carving and engraving the tombstone details: Use a rotary tool to carve intricate designs, words, and patterns onto the foam surfaces.
- Texturing the foam to create an aged look: Spray water onto the foam and use a heat gun to create a textured and weathered appearance.
- Sealing the tombstone with dry lock masonry sealer: Apply a coat of sealer to protect the foam and give it a finished look.
- Painting the tombstone with craft acrylic paint: Add color and depth to the tombstones for a realistic and aged effect.
- Adding final detailing with washes, dry brushing, and stippling: Use various techniques to enhance the appearance of the tombstones and add dimension.
- Enhancing with additional details like lichen or moss: Optional elements can be added to create a more eerie and authentic look.
Tips and Tricks
- Work in a well-ventilated area when using paints and sealers to avoid inhaling fumes.
- Experiment with different textures and colors to create unique and customized tombstones.
- Allow each layer of paint to dry completely before adding additional details for the best results.
Safety Precautions
- Use protective gear such as gloves and goggles when handling sharp tools like knives and rotary tools.
- Be cautious when using a heat gun to avoid burns or overheating the foam.
- Practice safe techniques and follow instructions carefully to prevent accidents and injuries during the DIY project.
Final Touches and Display
Once you have completed your DIY foam tombstones, display them in your yard or home to create a spooky Halloween atmosphere. Consider pairing them with additional props and decorations to enhance the overall effect and create a haunting graveyard scene.
Conclusion
Creating DIY foam tombstones for Halloween is a fun and creative project that allows you to personalize your decorations and add a chilling touch to your home. By following the step-by-step instructions and exploring different techniques, you can create realistic and eerie tombstones that will impress your friends and neighbors. For more inspiration and ideas, check out other DIY Halloween projects by Wicked Makers and let your creativity run wild this Halloween season!


