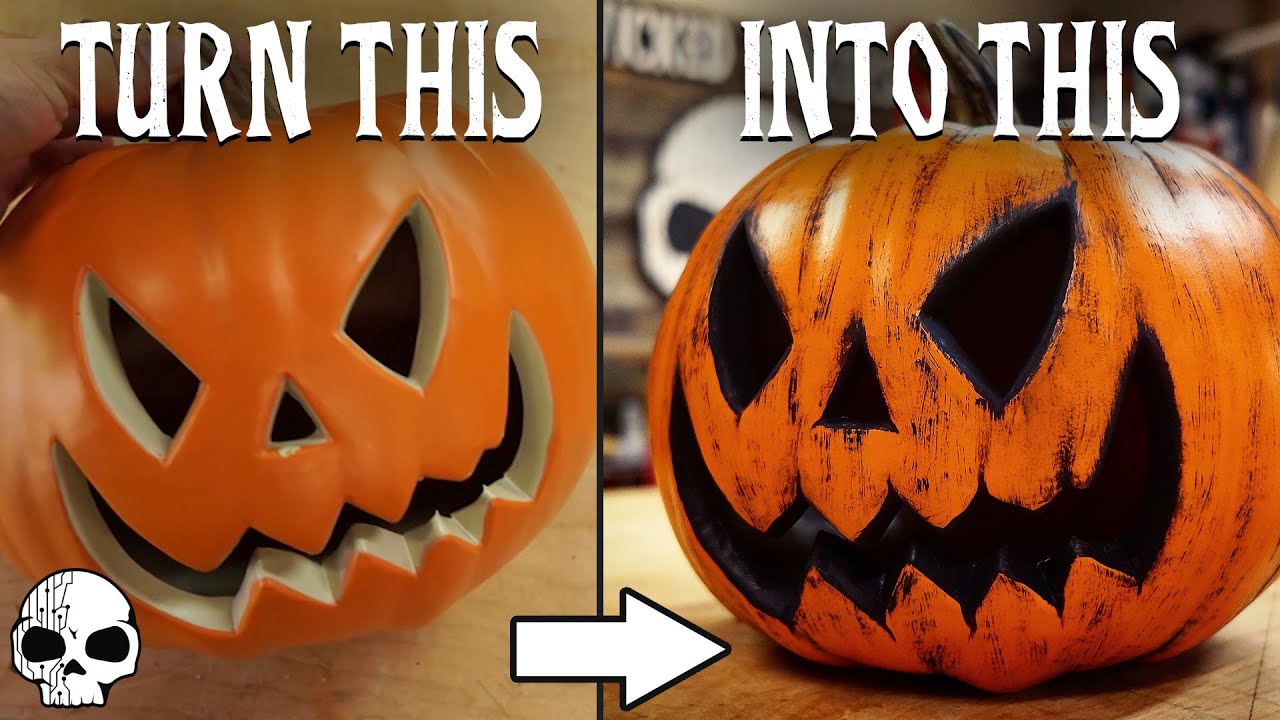
Hey there! Today, we’re going to show you how to make a super cool Halloween Scarecrow using just a few materials. Jamie and Jay will guide you through the process of turning a plastic jack-o-lantern into a spooky outdoor decor piece. With some basic tools and a bit of creativity, you can easily create this awesome Halloween prop to impress your guests this season.
Using reclaimed wood, sticks, and some twine, you’ll be able to build a unique scarecrow that will add an eerie touch to your Halloween decorations. Following some simple techniques like painting and assembling the pieces together, you’ll have a one-of-a-kind scarecrow that will make your yard stand out. Get ready to have some fun crafting this DIY Halloween prop and let your creativity flow!

Introduction
Halloween is just around the corner, and what better way to celebrate than by creating your very own DIY Halloween Scarecrow? In this article, we will guide you through the process of turning a basic plastic jack-o-lantern into an amazing Halloween decoration. With some simple techniques and a bit of creativity, you can easily transform your home into a spooky wonderland. Watch the video by Wicked Makers for inspiration and step-by-step instructions on creating your own DIY Halloween Scarecrow.
Basic Techniques
Creating a Halloween Scarecrow involves a few basic techniques that can take your decoration from ordinary to extraordinary. Some of these techniques include painting the inside of the pumpkin, extending face shapes, and dry brushing for variation and contrast. By mastering these techniques, you can add depth and character to your scarecrow, making it stand out among the rest of your Halloween decorations.
Materials and Tools
To construct your DIY Halloween Scarecrow, you will need some basic materials and tools. Gather wood, such as reclaimed fence pickets, sticks, a karate saw, drill, and clamp. These tools will help you cut and assemble the scarecrow’s body parts with ease. By having the right materials and tools on hand, you can bring your Halloween vision to life in no time.
Constructing the Scarecrow
Start by choosing the right wood pieces for your scarecrow’s body. Prepare the scarecrow parts, including the spine, ribs, shoulders, and arms, by cutting them to their final lengths. Attach the pieces together using a combination of wood glue and screws, ensuring they are secure and stable. Create creepy hands using sticks and branches, and add cheesecloth as clothing for a spooky touch. Don’t forget to cut a hole for the neck to complete the scarecrow’s look.
Finishing Touches
Once the scarecrow is assembled, it’s time to add the finishing touches that will bring your creation to life. Distress the cheesecloth to give it an aged look and contrast the wood by painting it black. These final touches will add depth and character to your scarecrow, making it a standout piece in your Halloween decorations.
Personalization and Fun
Making a DIY Halloween Scarecrow allows you to get creative and personalize your decoration to fit your style. Add unique touches, incorporate personal elements, and let your creativity shine through. Whether you want your scarecrow to be cute, spooky, or somewhere in between, the possibilities are endless. Have fun with the process and make your scarecrow as unique as you are.
Conclusion
Crafting your own DIY Halloween Scarecrow is a fun and straightforward project that can bring joy and creativity to your Halloween celebrations. By using basic materials and techniques, you can create a unique and eye-catching decoration that will impress your friends and family. Embrace the process, unleash your creativity, and enjoy the satisfaction of bringing your Halloween vision to life with a handmade scarecrow. Let your imagination run wild and create a Halloween masterpiece that you can be proud of. Happy crafting!


